Friday, January 25, 2013

Valentine's Decor In The Living Room...

I wasn't too excited to put up my Valentine's Decor this year...
I don't know why, but I still feel a little overwhelmed from putting away all of the Christmas stuff!
I wasn't sure if I was ready to put up more "red" decor already, but I did it anyways!
Here is my piano...


 I got this adorable free printable from the blog Simply Klassic.  
You can download this chalkboard print from her blog HERE.  Then just print & frame.  
I love It!
Then I hung the hearts with some ribbon and added a red & white wreath to my wire bird cloche.
Next, I put a tissue paper pom-pom on a candle stick.
I used them on my fireplace last year, you can see it HERE.

Lastly, I  moved my wreath up & added a bird garland to my mirror.

I got it at The World Market & then I just added some paper hearts!
It was a fun little change this year!

Wednesday, January 16, 2013

Baby Boy Shower


I had the opportunity to host a Baby Shower for a friend of mine.  
It was a neighborhood shower so we sent out about 50 invitations! 

I found the best site where you can make & print your invitations for FREE!
They turned out great!
I just printed them & glued them onto some colored card stock.  
When you are sending out a large amount of invitations this really saves you some money.
The site is called Ontobaby.com you can find it HERE.
They have great ideas & different choices of invitations to print! 
I used the Bunting Baby Shower Suite that looks like this...
It is really easy to use & they have a lot of color choices to choose from!

I also found the best site that makes the most beautiful Diaper Cakes!
They would make a wonderful gift!

Then for decorations I actually found most of my decor at Walmart.  
I was going to make a banner,but this one was only a dollar...which saved me some time!  
Then  I bought a package of tissue paper & made some tissue paper flowers to decorate the window, chandelier & cake!
Then I purchased napkins & a table cloth that matched the banner!

I placed the forks in a mason jar with a blue bow...
For dessert we served pie, mini pies, & homemade Oreo cookies...
We also served up a lemon bundt cake....
And some yummy Caramel Pretzels... These are so easy to do!  
Then for a little more decoration & a gift I hung some onsies with clothes pins across my fireplace.
It turned out to be a fun night!
I'm sharing with these blogs:

Saturday, January 5, 2013

Projects For The New Year...

Happy New Year!
It's really hard to believe it's 2013!
Are you the type that makes New Year's Resolutions?
 I definitely have a few things I want to do to our house this year!
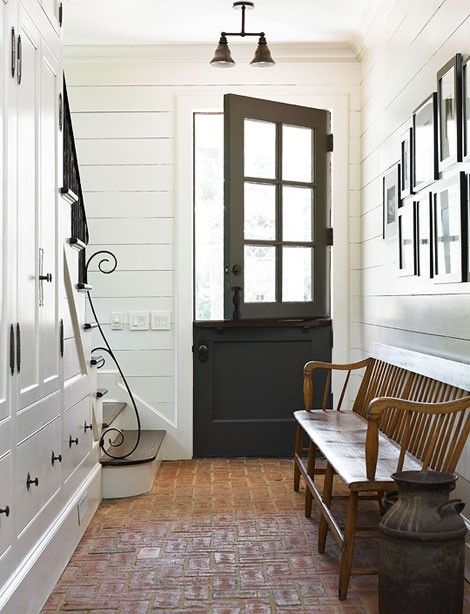
I definitely want to add more wood molding!  

We have added some to our entry way...
And in our daughter's Nursery....
I love how it changes the whole feel of a room.

My goal is to add some chunkier wood around the front door & living room windows.  

Here are a few inspiration photos...
This is from one of my favorite blogs Down To Earth Style...
Her whole house is inspiring, but I just love the wood molding around the door!

Next for the window casing...I found quite a few inspiring ideas!

Then on the main wall in my living room, I'd love to add a wood planked wall!
Photobucket
I love the look of this!  
When I asked my husband if he was ready to help me get started? He replied, "That's a lot of wood!"  
That is true, but it would look great!
 It only took about 5 years to get around to adding the board & batten in the entry way, but it sure turned out nice when we finished!
Just look at this entry way...
Source
I don't think you can really have too much wood molding & casing...it makes this room look amazing!!

Friday, December 14, 2012

Christmas In The Entryway...

 I just kept it real simple this year.

 I used the same glass jar that was used for my Fall Decor.
  I just added a red bow & changed the candy corn for some ornaments.

 Then I swapped out the orange flowers for some white ones.

Then I took a dollar store gift bag & framed it...
I love how it turned out! 
 It is such a cheap & easy way to get prints for the different holidays!
Last year, I used a bag that had a Christmas Tree.

Sunday, December 9, 2012

Family Favorite...Orange Jello Salad

This is always a hit at a party or BBQ! 
Next to my Oreo Cookies, this is the most requested item for me to bring for a party.
 It makes a large bowl,which is nice when you are serving a larger crowd.  
You'll always bring home an empty bowl...It's really good!

These are the ingredients you'll need:
3 boxes Tapioca Cook & Serve Jello Pudding
1 Large box Vanilla Cook & Serve Pudding
1 Large box of Orange Jello
2 (15 ounce) Cans of Mandarin Oranges (drained)
1 container Cool Whip (thawed)

Boil 6 cups of water & add your Tapioca pudding, Vanilla pudding & Orange Jello.
Stir constantly for about 5 minutes.
Let cool a little...


 Then pour into a bowl (I use a big Tupperware bowl with a lid).
Put in fridge for 6 hours or Overnight.

Then mix in the Thawed Cool Whip & Drained Mandarin Oranges.

Enjoy!!
 It is YUMMY!!
I'm sharing with these blogs:
Savvy Southern Style
52 Mantels
Flamingo Toes
Craftomaniac
Sumo's Sweet Stuff

Wednesday, December 5, 2012

"O Christmas Tree"

Our tree isn't a whole lot different than last year, but for some reason it was hard to get it to look right!
It could of been that I had 4 "extra" helpers for this one & the two boys couldn't wait to get the train up & were always right under my feet!  
Their excitement is contagious though & it is fun to make memories together!
Here it is...
I always stick with a red & white color scheme for this tree.
 I added our initial's that I made last year again...
You can see how I made them HERE.
 I always love my peppermint candy ornaments too!

 Our Merry Christmas block adds some color & fun to the tree!
 Once again, I used my snowflakes from the dollar store & our Christmas gift light!
 Our star was not staying up, so I just put a big snowflake...it kind of looks like a star!
Here is a shot of the corner of the room...
Merry Christmas!
You can see our other Christmas Decorations HERE & HERE
Sharing with these blogs:
The 36th Avenue
Tatertots & Jello
DIY Showoff
Savvy Southern Style
Thrifty Decor Chick

Friday, November 30, 2012

Our "NOEL" Staircase...

I changed our staircase a little this year...
I added some "Noel" letters that I made.  
I really like how they turned out!
I just added red & white scrapbook paper to some wood letters that I got from Hobby Lobby.
Then I just traced the letters onto the paper.
Cut them out.
I added a layer of  Mod Podge to the letters & stuck the paper on.  
Once they dried I put another layer over the top.
Then I actually put some Command Strip hooks on the back...I just hung them upside down so my wire would hook underneath & wrap around my railings. 
It worked great!

I did keep two of the wreaths that I used last year...One at the top of the staircase & one at the bottom.
It was a fun change & I like the pop of red & white color!

Here is last year's staircase...
AND
One more time....
This year!
We are almost finished decorating, I'll be showing our tree next!
I'm sharing with these blogs:
Flamingo Toes
Thrifty Decor Chick
Home Stories A to Z
The 36th Avenue
52 Mantels
Tatertots & Jello
Organize & Decorate Everything
DIY Showoff